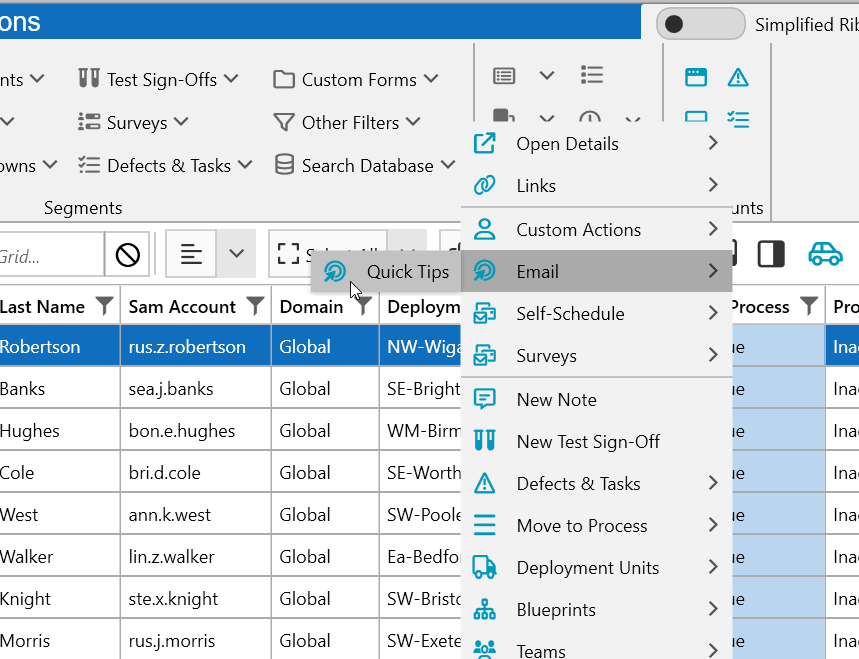
I’m sure you’ve noticed the rather nice-looking icons in ManagmentStudio, but did you know that you can also change them to match your project and make navigation even easier?
It’s incredibly simple to do and we’ve even integrated Font Awesome into ManagementStudio so that you don’t have to spend hours in Photoshop creating that perfect look!
Let’s look at three areas where you can customise the icons:
- The Module Menu
- The Project Selector
- Buttons
Choosing Your Icons
Before we get started, you’ll need to head over to fontawesome.com and search for that perfect icon. We use the regular style type which gives you over 6,000 icons to choose from!
To use the icon in ManagementStudio, you’ll need to make a note of the text that appears directly beneath the icon.
The Module Menu
We already have a good set of icons for the Module Menu but you might want to change or update these especially if you’re using the Bespoke module or the modules are used for another purpose.
In ManagementStudio, go to Administration > Project Settings and scroll to the Main Tab Settings.
Add the icon name in the Icon column and save the changes. You’ll need to restart ManagementStudio before you see the changes.
The Project Selector
If you’re running multiple projects, adding icons to the Project Selector will make it quicker to identify a project.
In ManagementStudio, switch to Administration > Project Settings and update the icon field in the Project Settings panel.
A preview will load to the left to let you know that you’ve entered the correct name. Once you’ve saved the changes, you’ll need to restart ManagementStudio for the changes to take effect.
Note: This is a project setting so you’ll need to load each project individually to set the project icon.
Buttons
Icons for some of the grid buttons – Custom Actions, Email, Self-Schedule and Surveys – can also be customised. We’re using the User Migrations module but the setting is available in all main modules.
In ManagementStudio, go to Administration > User Migrations > UI Buttons and add the icon name to the Icon column.
Bonus Tip!
So far we’ve focused on changing icons in the ManagementStudio client, but you can also use icons to enhance the look of your surveys!
If you’re not already familiar with surveys, you can find a refresher on our knowledge base. Otherwise, let’s jump straight in!
This example is based on the User Migrations module, but the concept applies to all modules that support surveys.
- Switch to the Administration > User Migrations > Survey
- Choose the survey that you want to update and click Display Fields
- Either create a New Field (#1 in the image) or update an existing one.
- Note: We’ll need to use the Text (Parsed) (#2) field type which accepts text and HTML. You will need to select this from the Special Control drop down.
- Add the icon code (more about this below) into the Special Control Text field (#3) and Save Changes
Rather than using the name of the icon, you’ll need to use the HTML code instead. When you search for your icon on fontawesome.com, click the icon to review it’s HTML code. The code will look similar to this:
<i class="fa-regular fa-rocket"></i>
If you want to make the icon larger, just add a multiplier at the end:
<i class="fa-regular fa-rocket fa-3x"></i>
Take a look at the Font Awesome support site for more help with sizing your icons.
That’s all for this week!
Using icons is a great way to personalise your project but don’t hesitate to get in touch with our support team if you need any help!


